Been awhile! I’ve moved to a new site: you can find me at roystan.net. I also have a Twitter and Reddit now that I’m active on.

Been awhile! I’ve moved to a new site: you can find me at roystan.net. I also have a Twitter and Reddit now that I’m active on.
Being the amateur Unity evangelist that I am, I have introduced several friends and colleagues to the engine (like at least three, possibly four). And each time, I find myself teaching the same set of tools and knowledge. To avoid doing that a fifth time, I’ve set out to write a series of Unity tutorials for the absolute beginner. I’m aiming to cover the most important topics in Unity—things like character movement, spawning objects and enemies, importing textures and other assets. Ideally, the series will eventually be comprehensive enough to expose a complete beginner to all facets of developing a complete game, from coding to art to sound.

Bang bang.
The tutorials are available below, or from the top bar. They start with a completely blank project, eventually building a simple third person shooter.
Due to multiple requests, I’ve built a GitHub repository for the Super Character Controller project. It can be accessed here.

This thing gives me nightmares
The project currently on the repo is extremely similar to the 2.0 release from several weeks ago, with the only main differences being that the demo models are now in the .FBX format, as opposed to the .max format. This is to ensure that users without 3ds Max will be able to download and contribute to the project without any errors.
This is the first open source project I’ve created, so please bear with me while I iron out any details I’ve missed and get the hang of this. As always, any contributions, comments or tips and tricks are appreciated.
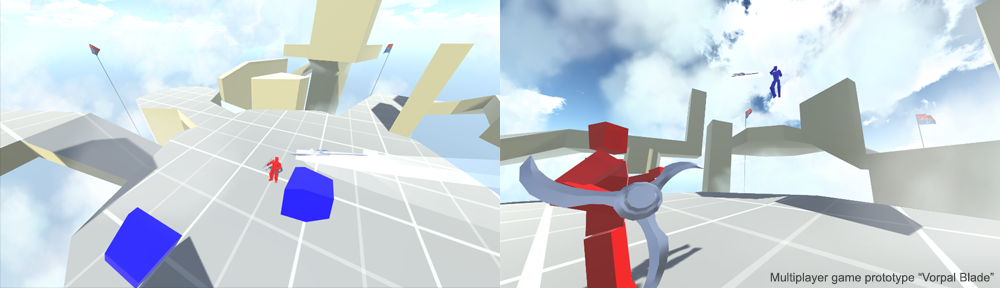
Immediately after completing the Mario 64 HD demo project I began working on the second version of the Super Character Controller. For over a month now I’ve had a download link up on the controller’s page for a Beta version of the project, which allowed users to see what I was working on at the time and contribute to the latest version.
As per usual, the Super Character Controller can be downloaded from it’s main page.
Just a blue man in a technicolour world
2.0.0 adds a number of features that are discussed in detail in the accompanying documentation, changlog, or previous blog posts, but below is an outline of the major changes.
The grounding algorithm in version 1 of the controller had numerous problems, mostly that it was inaccurate and inconsistent when dealing with several edge cases. Most of these have been resolved, with the solutions described in a previous post here.
Replacing the RPGMesh class is the BSPTree. BSPTree recursively partitions a mesh’s triangles into two sets using a series of partition planes. The component is complete, but not necessarily fully optimized or the best possible implementation of a BSPTree. More can be read in the Future Work section of the documentation.
Other updates can be viewed on the controller’s main page, as well as a list of contributors to the project. These changes are also showed in the README in the package, and all code and libraries used are sourced in the PDF document also included. If I missed anyone in the changelog or anyone’s code in the sources section, let me know so I can fix it.
There’s been a lot of interest in having a Git repo setup for this project, so now that version 2 is out it’s definitely on my radar, and hopefully something I can get setup soon. I’ve never setup and maintained an open-source project, so if anyone has any suggestions on best practices or tips n’ tricks, please leave them in the comments below.
Despite having written five posts about the Super Character Controller, up until now I’ve only briefly touched on the issue of ground detection. Knowing what your controller is standing on is a hugely important topic, since a great many of your player’s actions will depend on what kind of ground he is standing on, if any at all. Good ground detection can make all the difference between a smooth playing experience and a terrible one.

An example of bad ground detection
So what do we want to know about the ground beneath our character? We definitely need to know how far away it is. We’ll want to know if our character has his “feet” touching the surface of ground or if he’s 6 meters above it. We also will want to know the location of the point on the surface of the ground directly below us, as this is important for ground clamping, highlighted in a previous post. Thirdly, we will want to know the normal of the surface directly below us, a direction represented by a Vector3. And lastly it will be necessary that we know the GameObject that the ground belongs to, to allow us to retrieve any attached components to the object that may be relevant to grounding. (In the Super Character Controller, we retrieve a SuperCollisionType component that describes properties on the object).
Looking at an earlier post surveying the Unity Physics API, the most obvious solution to our problem comes in the form of Physics.Raycast. We can fire a ray directly downwards at the ground below us. Through the RaycastHit structure we can retrieve the contacted point, the distance traveled, the normal of the surface, and the object the ray collided with. This seems to fulfill all of our requirements at first glance, but looking more closely reveals a significant problem.
Our character controller is represented by a series of spheres to form a capsule, which means that when he is standing on directly flat ground, the nearest point on the surface of the ground will be exactly radius distance from the center of the lower sphere in the capsule. This is fine, but problems appear once the character is standing on a slope. If we now fire a raycast directly downwards (as before) the point we contact is no longer the closest point to our “feet.” This will cause issues with our ground clamping method (among other things).

Ray is cast directly downwards from the center of the lowest sphere in the controller. As the controller is standing on a slope, the point directly below is NOT correct, and when the controller is clamped to that point it introduces an error where the controller is slightly clipping into the slope. For steeper slopes, this error will become more pronounced
Luckily, we have a savior in the form of Physics.SphereCast. Instead of casting a thin ray downwards, we cast a sphere (if it wasn’t already clear enough in the name). This will solve the above issue by ensuring that our controller is properly aligned to the surface below us, regardless of it’s normal.
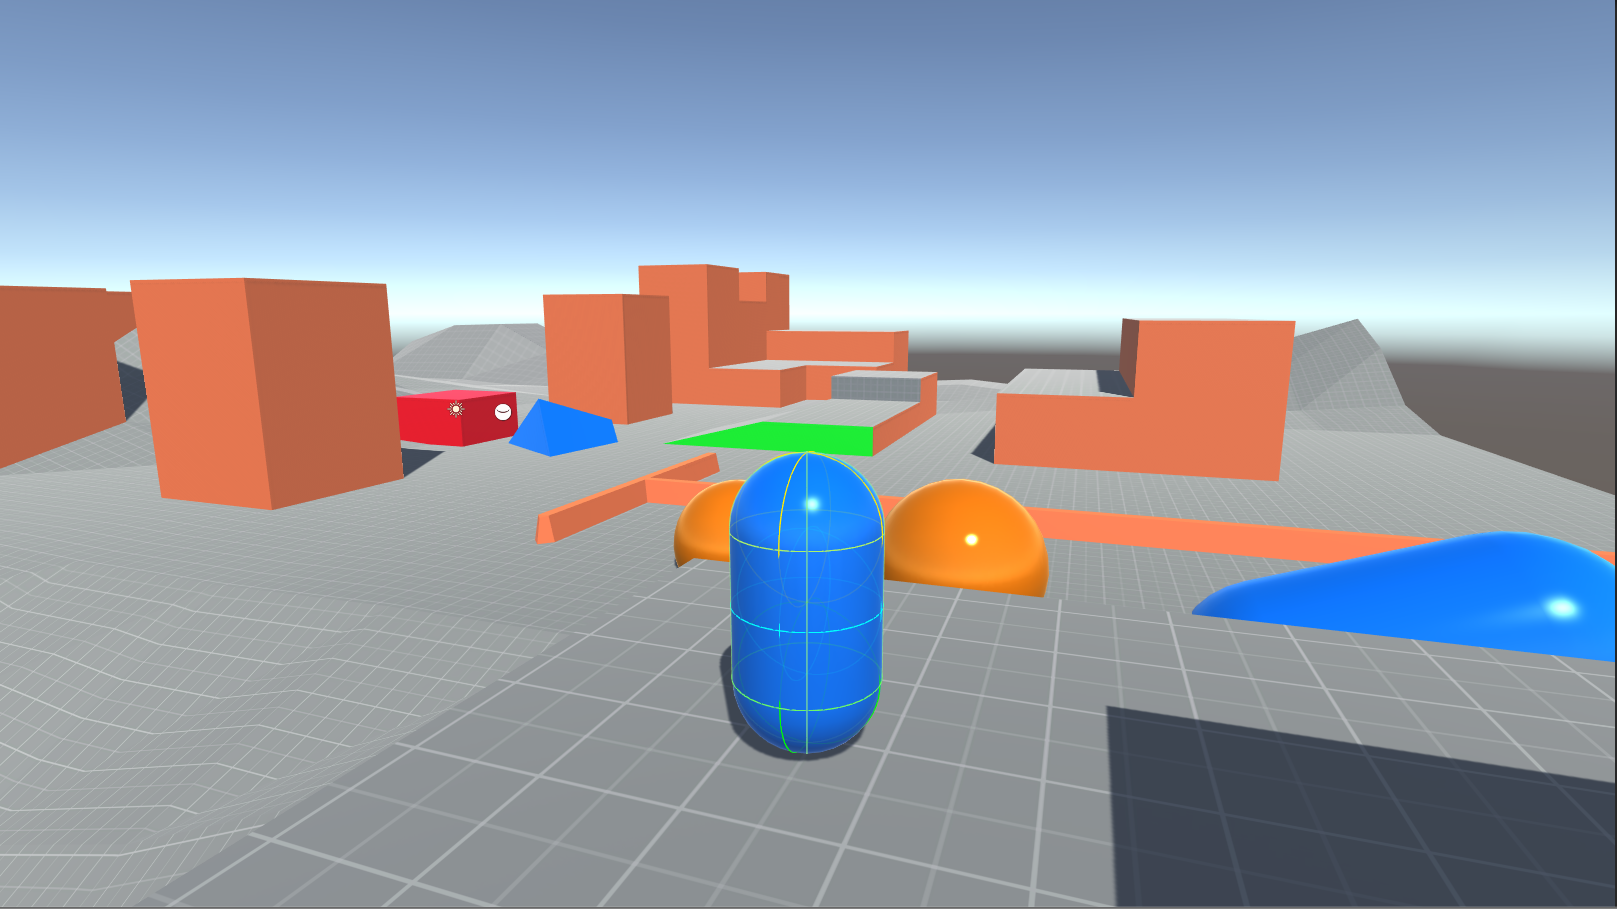
While SphereCast works extremely well in representing our controller’s “feet,” it comes with a few issues. The first is one you will encounter regardless of what you’re using SphereCast for: when the SphereCast contacts the edge of a collider (rather than a face directly on) the hit.normal that is returned is the interpolation of the two normals of the faces that are joined to that edge. You can think of it similar to the Vector3.Lerp method, with the normals of the two faces being your from and to values. The t value would then be represented by how far the contacted point was from the center of the sphere that contacted the surface; if it hit dead center, the from and to would be equally weighted with a t value of 0.5, and as you move along the edge it would increase or decrease.

Animation demonstrating SphereCast hit.normal interpolation. Yellow wire sphere is the origin point; red is the target. The green vector represents the hit.normal. Notice how as the SphereCast moves over the edge of the box, the hit.normal is interpolated between the two normals of the joining faces
I discovered fairly early on that it was necessary to know the actual normal of the surface you are standing on, rather than just the interpolated normal. To solve the problem presented by SphereCast’s interpolation, I would follow up the SphereCast with two separate Raycasts aimed at each of the two joining faces which would retrieve for me the correct normals. (In the Super Character Controller’s ProbeGround method, these are called nearHit and farHit, representing the normals of the closest and furthest face from the center of the controller, respectively.)
The next issue with SphereCast is specific to using it for ground detection but highly essential to ensuring proper accuracy. We’ve been assuming that anything the SphereCast collides with is valid ground that our character can stand on (or slide or, in the case of some slopes for certain games). In practice however this is not always true! We can reasonably assume that the physical surfaces of a game world (that the controller collides with) can be divided into ground and walls, with the idea that only the ground surfaces should be detected by ground probing methods (like the SphereCast defined above). The simplest way to partition the world into ground and walls would be to say that any surface with any angle (relative to the Vector3.up of the world) less than 90 degrees is ground, while surfaces angled 90 and above are walls and cannot be detected as ground. Therefore we should ensure that we never mistakenly detect a wall in our ground probing method. Naively it looks like this problem is implicitly solved by the nature of our ground probing: we are casting a SphereCast directly downwards, which means it should (in theory) never contact a 90 degrees wall. However, very often the normals of the walls in a game world will only be near 90 degrees, or somewhere between 85 and 90. We want to treat these 85 degree angle surfaces as walls, meaning that they should be ignored in our SphereCast.

Our controller is flush up against an 85 degree angle wall. Due to this slight angle in the wall, our SphereCast’s contact point is at the yellow X marker, rather than the surface directly below us. This will cause our controller to believe he is standing on a steep slope, rather than safely on flat ground
The most obvious solution would be to use Physics.SphereCastAll. It would ideally collide with both the steep wall and the flat ground, and we could iterate through all contact points to decide what we are standing on. Unfortunately, SphereCastAll only picks up a single contact point per object, so if the ground and wall are part of the same mesh collider, this solution will not work.
Trying something simpler, we could just reduce the radius of the SphereCast by a small amount to account for the above error. And for very slight errors, this does solve some problems, but not all. We still need to find a way to reliably retrieve the proper ground when flush up against a steep slope.
[ Note: In the Super Character Controller, the angle of a “steep slope” is defined as the value StandAngle in the SuperCollisionType component attached to each object the controller collides with. ]
To do this, let’s make the assumption that there is some sort of ground beneath us, and that if there was not a steep slope blocking us our SphereCast would have contacted it. To retrieve this ground, we can Raycast down the steep slope our SphereCast hit. This is primarily to verify that there is some sort of ground there, and (more importantly) to retrieve it’s normal.

Initial SphereCast contact point marked in yellow. Because we have contacted a steep slope, we Raycast (shown in red) down the slope to detect the ground that is actually beneath us (Raycast contact point marked in purple)
This tells us what’s below us, but because we used a Raycast, and not a proper SphereCast, we once again run into the problem presented earlier, where the shape of our ground detection does not correctly align with the shape of the bottom of the controller. Given the information we have (the normal of the surface below us), can we somehow transform our Raycast data into an approximation of SphereCast data? Yessir.
When you SphereCast downwards from the bottom of the controller and contact a surface, there exists a relationship between the normal of the surface and the point on the sphere that the contact takes place. When we Raycast down the steep slope have the normal of the proper ground surface, so it’s our job to find the point along the bottom of the controller that a SphereCast would connect with. We also have the planar direction (from top view) towards the point (given by the direction of the slope below us), allowing us to tackle this problem in 2-dimensional space (finding a point on a circle, as opposed to a sphere) and then convert our result to 3-dimensional space.

Animation showing how the contact point of a SphereCast is directly related to the normal of the surface it collides with. SphereCast origin in yellow, contact in red, with the contact point marked in light blue. Notice how as the slope becomes steeper the point moves further up and along the edge of the red circle
Since we are attempting to find a point in 2d space, we are looking for two values which we can call x and y. If calculated properly, x and y will describe a point along the position of our circle. Referring to the diagram above as an example, we would be given the normal of the ground surface, and our job would be to calculate the position of the light blue point.
Luckily, this really isn’t all that difficult. Referring back to grade 8 math, we can use the Sine and Cosine functions to calculate the x and y positions, with the normal of the surface being the angle we pass in.
x = Mathf.Sin(groundAngle);
y = Mathf.Cos(groundAngle);
Pretty handy. Note that in Unity the Sine and Cosine methods require you to pass in the angle in radians, so ensure you convert your angles beforehand.

Calculating the contact point (light blue) from the angle of the green slope using the Sine and Cosine functions
We can now use these values to find our point by adding them to the position of our controller (multiplied by it’s radius). Effectively, we’ve now converted our Raycast data in SphereCast data, and nobody is the wiser.
[ Note: In the Super Character Controller, the method for approximating SphereCast data based off a surface normal is called SimulateSphereCast. ]
This sums up the current technique I am using for ground detection (in the Beta controller). Unlike previous articles, the question of finding a solution to the problem of detecting ground is fairly open—the above is by no means the optimal solution, although I’ve found it works very well in practice. I plan to write a follow-up to this showing how to actual use the data we’ve worked so hard to retrieve, since it’s a somewhat involved process.
I’ve noticed when talking to various Unity users (and browsing the forums) there seems to be a bit of confusion about the purpose of the Lerp methods, and how and when to use them. This isn’t too surprising given that the documentation on Lerp is bizarre (it uses Time.time as a t value, something that by the end of this tutorial you’d know is somewhat odd). I’ve also supplied a Unity webplayer below to visualize how Lerp works.
Lerp stands for Linear Interpolation. Unity has a family of Lerp methods that all function pretty much the same way but have different applications: Mathf.Lerp, Vector3.Lerp, Color.Lerp, and Quaternion.Lerp.
Lerp essentially lets you pick two values, a from and to value, and then select a t value that returns an interpolation between the from and to. The t value is clamped between 0 and 1 (regardless of what you put in the method as a parameter) so you can think of it like a percentage; 0.4 is 40%, 0.6 is 60%, and so on. This leads to the idea of thinking that when you run Lerp on a from and to values, you will get a value t percent between the two. Lets look at some examples.
Mathf.Lerp(0, 100, 0.5f)
This is trivial. We can read this as asking Lerp to give us the value 50% between 0 and 100. This will return 50.
Mathf.Lerp(50, 80, 0.3f)
This will return the value 30% between 50 and 80, which is 59. To make Lerp’s inner workings less opaque, you can actually verify these values using simple arithmetic. You really just need to get the range between the two values, multiply that by the t value and then add that to the from value. For the example above you would do.
range : 80 - 50 = 30
distance by t value : 30 * 0.3 = 9
interpolated value : 50 + 9 = 59
(The above is in pseudocode and not C#)
As stated above, the other Lerp methods work in pretty much the same way. Vector3.Lerp has you select two Vector3s for the from and to values, Color.Lerp uses Colors (duh), Quaternion.Lerp, rotations.
You don’t always have the luxury of having the t value easily supplied for you. Often when using Lerp you are attempting to relate two different values to each other. An example of this would be simulating camera shake when a player is nearby a cannon firing: the further the player is away from the cannon, the less the camera shakes. Therefore there is a clear relation between the distance the player is from the cannon and the magnitude of the camera shake. (This example is based on the cannons from the Mario 64 HD project I built, specifically the FiringCannon class.)
Unity supplies a method named InverseLerp. InverseLerp takes a from and to parameter, and then a value parameter which should be somewhere between from and to. I’ll do an example before we try it out on the camera shake problem stated above.
Mathf.InverseLerp(30, 60, 45);
We can read this as “how far is 45 between 30 and 60?” This will return 0.5, as 45 is halfway between 30 and 60.
For our cannon, lets assume we have some CameraShake(float magnitude) method that we will use. We will state that the maximum shake magnitude is 20, and the minimum is 0. We will also say that the maximum distance the player can be from the cannon and still feel the shake is 50, and the minimum 0. Let’s solve this.
float t = Mathf.InverseLerp(0, 50, Vector3.Distance(cannon.position, player.position));
Where cannon and player are Transforms. This will give us a t value that is 0 when the player is immediately beside the cannon, and 1 when the player’s distance is 50 or greater. We now need to get the proper shake magnitude.
Mathf.Lerp(20, 0, t);
You’ll notice that the from value is larger than the to value. This perfectly acceptable and is done because we want the shake magnitude to be a maximum when the player’s distance is 0 (and the t value is 0) and at a minimum when the player’s distance is 50 or greater (and the t value is 1). If for whatever reason you need the from value to be the smaller of the two, you can always invert t by subtracting it from 1.
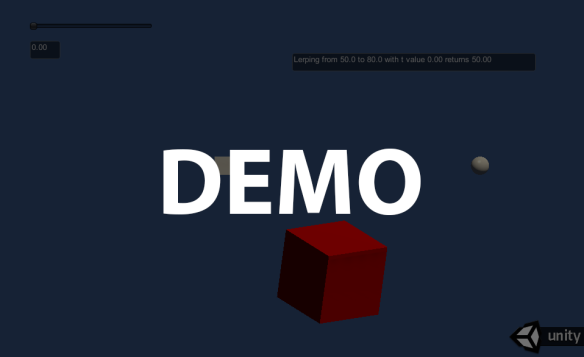
I’ve added a demo below showing Lerping between two values (Mathf.Lerp), positions (Vector3.Lerp) and colors (Color.Lerp), with the t value controlled by the slider. Hopefully this will clear up how Lerp works and has demonstrated how useful a method it is.
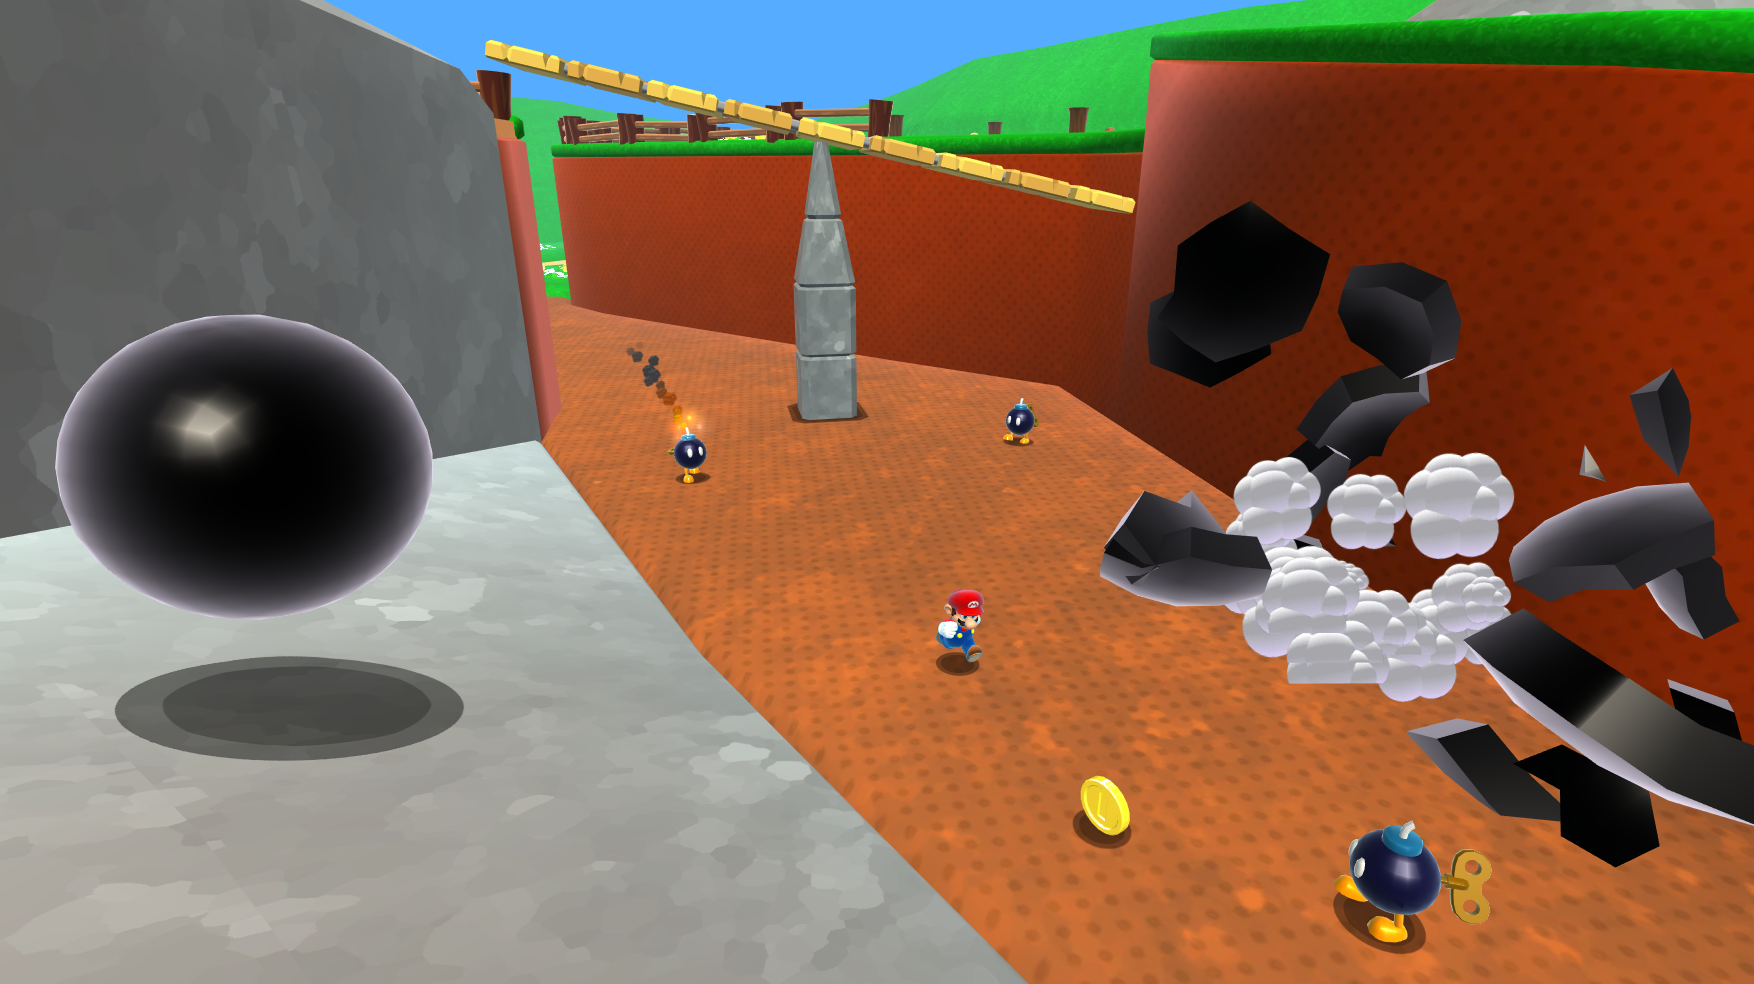
Due to requests from Nintendo, this project is no longer available. Head over to the Mario 64 HD page to read more. The original blog post is unaltered below. Below is a video of the mod being featured on cobanermani456‘s channel.

Bob-ombs are my favourite Mario character, closely followed by the loyal Bob-omb Buddies
Given the amount of time this took to build, I’m going to do away with the usual preamble typically accompanying these posts (or is it too late already?). For the time being, I’m finished working on both the Super Character Controller as well as the demo for it, Mario 64’s Bob-Omb Battlefield. Since the Super Character Controller is (was?) the primary focus of this project, I’m planning to post a write-up and retrospective on it, including what could be done to improve it in the future. Both projects include a PDF fully documenting them. In addition to the using the Super Character Controller library (written by me, but adapted from code by fholm), Mario 64 HD also uses a couple other libraries from the community. All references to these (as well as sources for any art and sound assets I did not make myself) can be found on the downloads page, but since some people may never make the pilgrimage there from this post I figured it would be nice to include them here. Pixelplacement’s iTween was used to help animate the rolling metal balls as they path around the mountain. Since Unity doesn’t expose the InputManager to be modified at runtime (another one of it’s lovable quirks), a heavily modified version of cInput v1.4 was used. Past version 2 cInput is no longer free, but since it looks like the author has been working on it for awhile I suspect there are tremendous improvements from 1.4, which wasn’t all that difficult to integrate anyways. Probably worth the $30 on the asset store!
Most of the art assets that were not constructed by me are from Mario Galaxy, but I did all the animations for them. Sound assets likewise were primarily ripped from different Mario games, or acquired from freesound.org, a very useful (and free, in case you didn’t pick up on that from the name) online sound library. If anyone sees (or hears!) any assets in the project that they themselves made, please contact me so I can give the proper credit. I imported the project to Unity 5 and fixed all the errors that cropped up, but none of this project was developed using any of the new tools available, like Global Illumination or Render To Texture. For anyone wondering what tools I used, they were as follows: Unity (duh), Photoshop, 3ds Max, and Adobe Audition. I used Adobe Premier and Fraps to make the trailer above, as well as the capture videos from the original Mario 64 to use as reference for animations. I used the N64 emulator Project64 for this, which I also used to capture sounds directly from the game. All of the mesh files are currently in the .max format, so while you will be able to open the project without issue, unless you have 3ds Max you’ll be unable to edit the files.
get rekt m8
I probably am not going to expand on this project any further, since it would be insanely time consuming to continue any further, and my primary motivation to build this was to drive development on the Super Character Controller and provide a demo project for it. That said, if anyone wants to continue working on this, feel free! The project is open source and can be used for anything you like, short of selling it. If anyone is interested in playing the original (and superior) version of Mario 64, it’s available on the Nintendo 64 as well as the Wii’s Virtual Console.
Since it seems like school is slowly but surely taking over my life (for the time being…) I figured it would be best to release the Super Character Controller package before I complete the Mario 64 demo project, since at this point an ETA for that is pretty far off.
I have added two ways to download the controller: you can either get a .zip file containing an example project or a .unitypackage of the essential scripts. The example project includes a demo scene with a (very basic) implementation of the Super Character Controller™.

Just a blue man in a green world…
Download the Super Character Controller
Regardless of whether you open the demo project or import the .unitypackage, you’ll have a folder containing all the essential code, named SuperCharacterController®. Inside this folder there is: the RPGController folder containing classes used to build Mesh trees written by fholm; a README file, Math3d class (by BitBarrelMedia), DebugDraw class (by me) and finally a Core folder that holds all the character controller classes.
You shouldn’t ever need to touch anything in the RPGController folder unless you plan on doing some rewriting of the mesh trees. Math3d is hugely useful and is widely used inside the controller classes. DebugDraw is a class I wrote to streamline drawing visual debugging cues to the screen, and has some helpful methods that will draw vectors, markers, etc.
Inside Core there are five classes. SuperMath is a static class where I dump any useful math functions I come up with that are not represented in the standard Mathf. SuperCollider is another static class, with it’s only current method being (three variations of) a tool to find the closest point on the surface of a (Sphere, Box or Mesh) collider. SuperCollisionType is meant to be attached to all objects the controller collides with, to allow the user to customize certain properties (at what angle on this surface can the controller stand, slide, fall, what type of ground is it, and so on). This is meant to have additional properties written in (although in the future using some sort of inheritance would probably be better). Currently, every object the controller collides with is required to have this attached.
SuperStateMachine is a modified version of the state machine built in the Unity Gems Finite State Machine tutorial. Mine is a bit more stripped down for simplicity but is still hugely powerful. Having an easy to implement and use state machine is by far one of the most important components of game development, especially when it comes to prototyping character movement and actions. This state machine is written to function exclusively with the SuperCharacterController. Characters that use the state machine are implemented as a subclass of the SuperStateMachine. I typically using a naming schema following the pattern of “CharacterNameMachine.” For example, my Mario 64 project has classes named MarioMachine, GoombaMachine, BobombMachine, which all inherit from the SuperStateMachine.
[ EDIT: The above link previously pointed to unitygems.com, which as of Jan 1st, 2015 displays only “pageok” on it’s home page. As the page is clearly not okay despite it’s assurance, I changed the link to instead point to a web archive of Unity Gems ]
Finally, we have the man of the hour, the SuperCharacterController©™®. In general (or at least initially) you won’t need to do much to this component other than add it to your objects. It broadcasts a message to all other scripts in your object to call a function named “SuperUpdate”, where you can perform all your character logic and movement. Much like the Unity character controller, you’ll probably want to cache a reference to the Super Character Controller in your controller scripts. This way, you can access certain public members (controller height, radius, etc.) and public methods (to disable and enable clamping, ignore colliders, and so on). For a more in depth description, see the example attached to the demo project.
I tried to test this package as much as I possible could, but this is the first time I’ve really distributed a project this large, so hopefully it will work fine on everyone’s different machines and software. If anyone runs into any errors, please post them below as a reply.
And no, SuperCharacterController isn’t actually trademarked/reserved/copytradereservemarked.
It’s been awhile since I’ve posted on here, and for good reason! To ensure that my Customer Unity Character controller is able to meet a wide variety of use cases, I figured it would be best to create a demo character implementing the tool. I wanted to pick a character that would be reasonably complex, since I figured a simpler one wouldn’t highlight it’s features (or help me discover it’s problems) as well. To that end, I decided to base my implementation on…

The best
Super Mario 64! Aside from being one of the best games of all time and one of my personal favourites, Mario boasts a wide range of moves that would test the limits of my Character Controller. Initially, I planned to grab a Mario model from somewhere, do a couple quick animations and build a controller that would implement a fairly small subset of his moves. However, things quickly got out of hand…

pls no c&d ninty
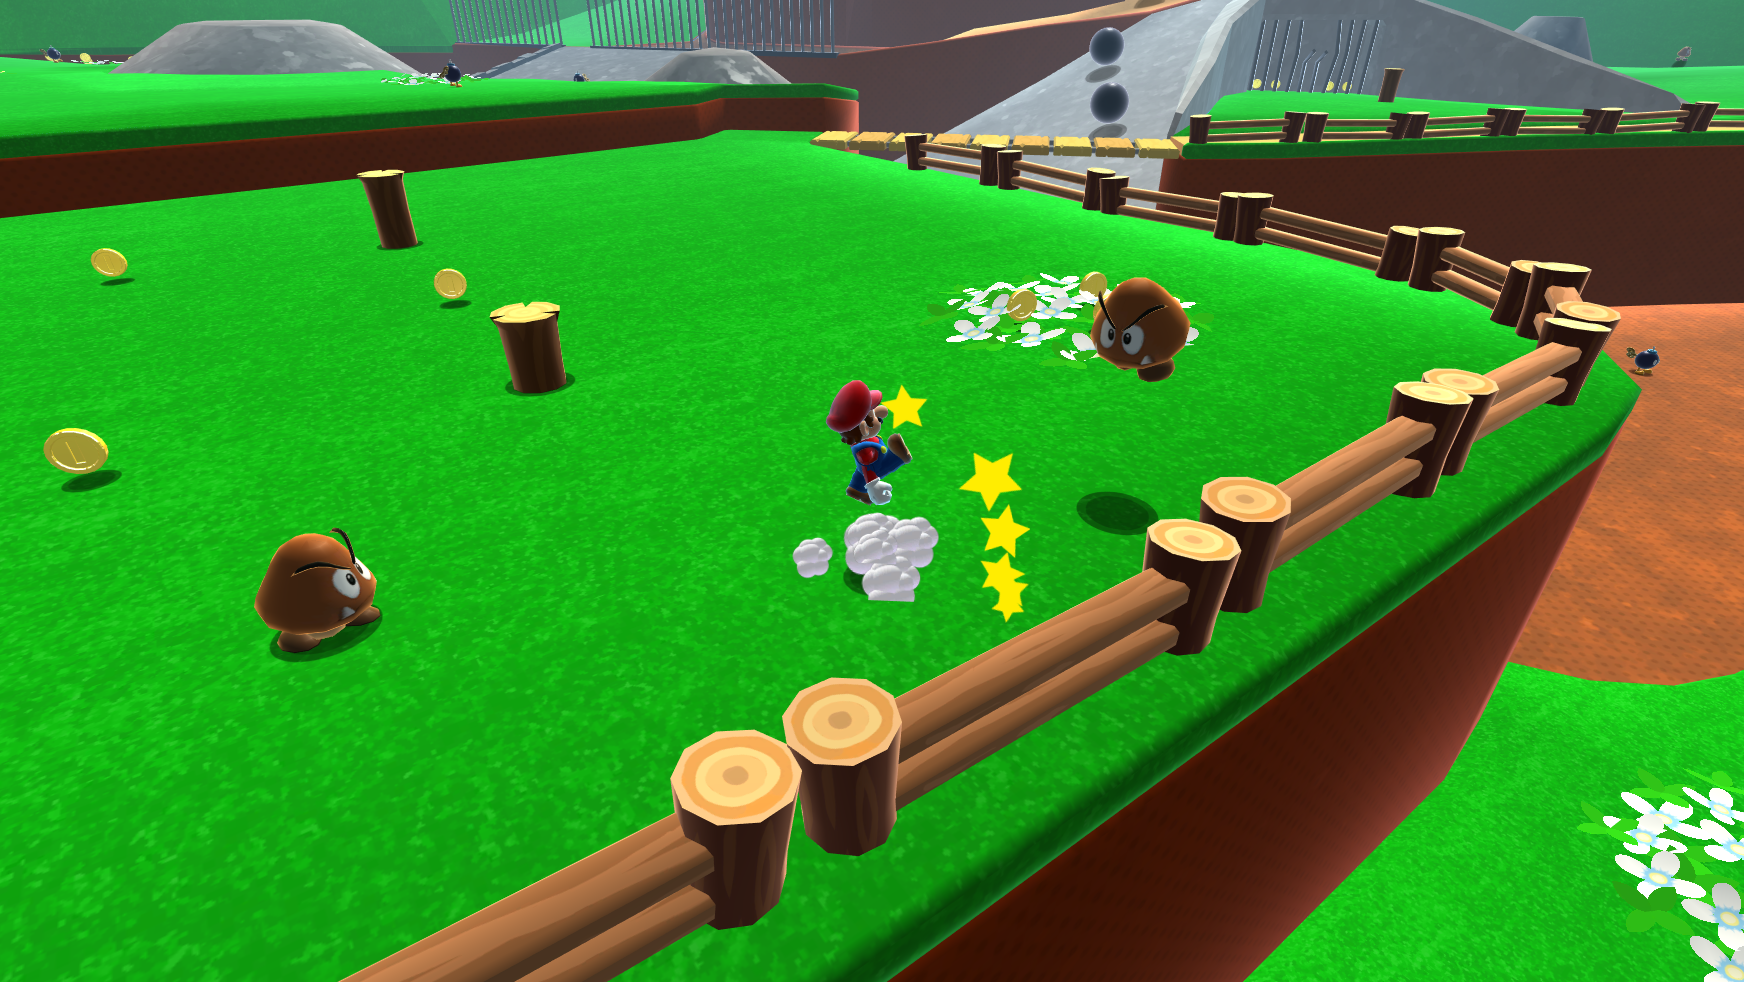
…and before I knew it, I had added in virtually all of the moves from the original game, a fully animated Goomba and Bob-Omb, and had begun to build an HD version of Bob-Omb Battlefield, the game’s first level.

Current progress on Bob-Omb Battlefield Redux. Got a ways to go…
In addition to being a huge time sink, this project is serving two purposes: demonstrating the character controller, and helping me learn the ins and outs of 3D art. The Mario model I’m using is borrowed from Mario Galaxy, but it didn’t come with bones, rigging or animations, leaving the task to me. This was made infinity easier by this terrific tutorial I found on character rigging using 3ds Max.

Super Mario, master hula-hooper
I plan to release the project on this page sometime in the near future, and hopefully it will help others build their projects!

Editor shot of the same scene as above. SuperCharacterController with three debug spheres enabled on Mario.
After nearly a month of silence, the wait is finally over! No longer will you have to endure the hardship of waking up every morning, immediately opening my illustrious blog only to suffer a crushing disappointment deep in your soul. …Anyways. In the intermediate time since the last post, I’ve built a first draft of the character controller, and I’ll be going over it’s implementation in this article. This post will concern itself solely with the main controller class—in the next article, I will go over an application of the controller in a demo character that I’ve built. The controller itself is a single C# script, which can be downloaded here. As with the previous Pushback example (from the second part of this series), I am making use of some of fholm’s RPG classes, as well as a modified version of a class which he uses to find closest points on the surfaces of colliders called SuperCollisions.cs. In addition, for debugging purposes I typically use my own DebugDraw.cs class to draw markers and vectors on the screen. Finally, I use the lots of the 3D math functions found in this class, by Bit Barrel Media. In the future, it’ll probably be simpler for me to just post a Unity project, but for now since we’re just mostly focusing on a single class today, this is easier. I’ll go over the basic structure of the controller, and then iterate through each of it’s features in more detail.
[ EDIT: past Erik was spot on. You can now get the controller through the Downloads page. Note that the code linked to above is an earlier version of the character controller, which I am leaving posted here for clarity and learning purposes. If you are planning on using the controller in your project, please head over to the Downloads page for the up-to-date and complete code along with a sample project ]
The controller goes through three primary phases: Movement, Pushback and Resolution. In the Movement phase, we calculate all of our character’s movement logic and modify his position accordingly. We then run our Pushback function, ensuring that he is not intersecting any of our geometry. Finally, we run any necessary Resolution steps. These could include limiting the angle of slope our character could move up, clamping him to the ground, etc.

Figure showing the movement and pushback phases of the controller
Before we get started I should note that, unlike the previous controller, this one is built using three OverlapSpheres, placing one above the other, to simulate the shape of the capsule. The controller is built to work with any number of spheres—tall slim characters may require more than three, while short squat ones may need less. Let’s take a look at the code now. The first phase within our controller is fairly simple for the time being, consisting of a single instruction:
transform.position += debugMove * Time.deltaTime;
This allows you to set in the inspector how much the controller will move each frame. When we build our actual character, this line will be replaced with all of our movement logic. For now, it serves as a handy debugging tool. Phase two is Pushback. Here, our goal is to check if the controller is intersecting any colliders, and if so to then push him to the nearest location on their surface. The basics of how we do this can be seen in the Implementation article I posted earlier. This time around, the algorithm is slightly more complicated. The first half of the method is more or less the same as before; we check the nearest point on the surface of any collider within the OverlapSphere. Next, we need to see which side of the normal the origin of the OverlapSphere is. We do this by raycasting from the center of the sphere in the direction of the nearest point on the surface. Since a raycast only detects a surface if the normal is facing the cast, whether this cast returns true of false will tell us if the origin is outside or inside the surface, respectively. Note that in the code I use a SphereCast with a very small radius instead of a raycast; this avoids errors when raycasting directly at an edge of a mesh.

The “feet” OverlapSphere of the controller detects a collision with the ramp, finds the nearest point and then raycasts towards it (shown as the red arrow)
Before applying the pushback vector, we do a final check to make sure we’re still colliding with the object. Because the OverlapSphere will return all the collisions first and then apply the pushbacks one by one. This makes it is possible that, in the case of hitting multiple colliders, a previously applied pushback can have the side effect of moving the controller enough so that it is no longer colliding with objects that were originally touched by the OverlapSphere, but no longer are. We resolve this by checking the distance between the origin of our sphere and the nearest point on the surface of the collider; if the distance is greater than the radius and we are located “outside” the normal, we know that we are not touching it and were displaced by an earlier collision.

The controller’s lowest OverlapSphere collides with both the green ramp and the blue ground, with the nearest points on their surfaces shown in teal and blue, respectively. The ramp collision pushback is resolved first, causing a side effect where the OverlapSphere is no longer colliding with the blue ground
The third phase is less clear cut than the previous two. It can be defined as doing any “clean-up” or “reactionary” logic. There are two main methods that are executed here: slope limiting and ground clamping. Slope limiting should be familiar to anyone who has used Unity’s built-in controller: if a character attempts to move up a slope that is steeper than a specific angle, he is repelled by the slope as if it were a solid wall, instead of pushed up it. Ground clamping is not included in the Unity controller, and is fairly important. When moving horizontally over an uneven surface, the controller will not (by itself) follow the geometry of the ground. In the real world, we time our leg movements to allow for each slight increase or decrease in elevation, and gravity takes care of the rest. However, in a game world we need to handle this a bit more explicitly. Unlike the real world, gravity is not a constantly applied force in most controllers. When we are not standing on a surface, we apply acceleration downwards. When we are on a surface, we set our vertical velocity to zero, to represent the normal force exerted by the surface. Because our vertical velocity is zeroed out when standing on a surface, it will take time to accelerate our downwards speed when we walk off said surface. This is fine when we are actually walking off a ledge, but when we’re walking down a slope or over uneven ground, it creates an unnatural bouncing effect. In addition to being a problem visually, this oscillation between grounded and not-grounded is a problem for our actual game logic, since a character’s behavior is typically very different when he is on a surface compared to when he is a falling.

The left image shows how the character’s movement follows the uneven surface by ground clamping. On the right, we see how he “bounces” across the surface when clamping is not applied. Each red “X” represent when the downward force of gravity is zeroed out
This problem is solved in our reaction phase with the aforementioned “ground clamping,” which, as the name implies, will adjust our character’s position to be in line with the ground by SphereCasting directly downwards from our “feet.” Obviously, there are plenty of times when you do not want to clamp your character to the ground, such as when he is beginning a jump, or far enough above the surface that he should not be counted as standing on it. You’ll notice that I talk about whether the controller is “grounded” or not an awful lot. You’ll also see the method ProbeGround() be called multiple times throughout the main loop of the controller. Knowing when your character is standing on a surface and when he is not is very important to building a proper controller. I don’t intend to provide the tools to check if a character is “grounded” or not within the main controller class, since this depends greatly on your game’s structure. However, I do provide a method that will detect what is below the player, as well as store it (and some additional useful information) in a variable that is easily accessible. How you use this is up to you, but in the next article in the series I’ll be providing an example character that uses this controller and the data from the ProbeGround() method. The SlopeLimit method should be easy enough to understand as it’s functionality is familiar and I’ve commented it fairly well. (I actually haven’t. But I plan to before I upload the file.) Speaking of familiar functionality…those who know the Unity character controller well have probably identified that my custom controller seems to be lacking a feature: StepOffset. I do intend to tackle this method, but it seems much more complex than I initially expected, or I’m missing a simple solution for it. It’s definitely a “need-to-have,” since it’s pretty essential for most applications. That pretty much covers the Super Character Controller. Next time, I’ll go over an example character that I’ve built using the controller class detailed today, as well as provide the source code for it. If any of my code doesn’t seem to be working of compiling properly, please contact me so I can fix the error!
